
While driving your car, you rely heavily on a properly working fuel gauge to tell you when you need to fill up. Without it, every drive becomes a risk, and you’ll never know if you have enough fuel to get you home. If this vital piece of equipment stops functioning, you need to know the reasons why your fuel gauge is not working or is inaccurate.
Sure, you could count the miles with each fill-up, but you are rolling the dice. Instead, learn how to diagnose the problem and fix it once and for all. So, what are the common reasons a fuel gauge is not working or is inaccurate?
The most common reason a fuel gauge is not working or is inaccurate is due to a bad fuel level sending unit. It can also be caused by bad wirings between the gauge and fuel sender or a blown fuse to the fuel gauge. The fuel gauge itself could also be damaged.
Here is a more detailed list of the most common causes why your fuel gauge is not working or is inaccurate:
In This Article:
1. Defective Sending Unit

The sending unit is where the whole process begins. As your vehicle runs, the sending unit is constantly monitoring the level of fuel in the tank. However, this constant use means that it is prone to wear.
If the contacts wear out, the circuits can remain open. In turn, the fuel gauge might think the voltage feedback means that the tank is either empty or full, depending on how the car is set up. In this case, the gas gauge won’t change regardless of how much fuel is in the tank.
RELATED: Symptoms of a bad fuel sending unit
2. Circuit Issues

The fuel gauge runs off of electricity, requiring functioning wiring and circuitry. If there is a fault in the system, there might not be enough voltage for the gauge to read correctly. In some cases, the issue is because of an interrupted ground connection.
However, any loose connection or corrosion can lead to issues. These defects are most commonly seen with the connection to the fuel pump module because of the consistent exposure to the elements.
3. Bad Fuse

Along with the electrical connections, the fuel gauge also utilizes a fuse. You can find the fuse in the box located under the steering column or on the driver’s side of your vehicle. In some vehicles, there is also a fuse box under the hood.
Checking the fuse is simple to do and only requires a few minutes. You can find the map of fuses in the owner’s manual to determine which one runs the gas gauge.
Many newer cars do not have a separate fuse when the fuel gauge is integrated with the instrument cluster, but it can still be worth checking.
4. Broken Gas Gauge
While this defect isn’t as likely, it can still be the cause. There’s an internal circuit inside the fuel gauge that can fail. If this happens, the needle could read at any level.
If you see the gauge between the halfway point and full or empty, it might be a failed circuit in one area. Otherwise, if the needle is stuck at full or empty, the circuit is shorted. It’s unlikely that the gauge will ever move again until it is replaced.
The gas gauge is often integrated with the instrument cluster on newer cars, unfortunately.
5. Malfunctioning Instrument Cluster
With the newer cars, the instrument cluster is one integrated piece of equipment. Instead of using multiple circuits, it’s all intertwined.
In this system, if the instrument cluster fails, the gas gauge could malfunction as well. Sadly, this is one of the most expensive issues to repair.
How Does a Fuel Gauge Work?
The fuel gauge contains three vital parts that work together seamlessly. The gauge that you see relies upon the circuit and sender for information. If any one of these parts fails, the gauge could read wrong.
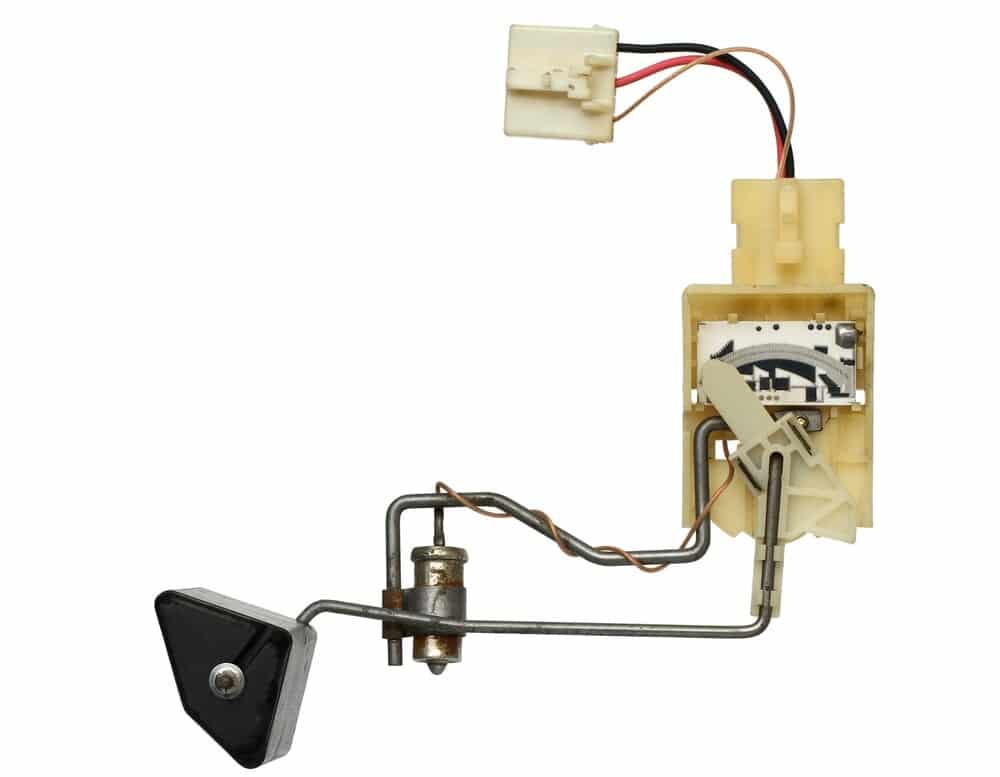
The fuel gauge sending unit is a component of the fuel pump module. Most systems rely on a sending unit that contains a float to read the fuel level. The circuit is used to connect the battery with the gas gauge and sending unit, but there’s also a connection to the ground. The majority of them are grounded to the vehicle’s electrical system. In older models, they are grounded to the frame or body.
What you see in the instrument cluster is just the gas gauge. It reveals the information that has been sent to it, showing you how much fuel is left in the tank.
How to Test the Fuel Gauge
1. Self-Test Instrument Cluster
Read your owner’s manual to determine if your instrument cluster has a self-test procedure. While every vehicle from the early 1990s has a procedure, it’s different with every make and model.
In some cases, you might be required to turn the headlights on and off several times while you press a button, but it could also involve turning the ignition. During this self-test, you should see the fuel gauge go through an entire sweep of the different locations. If it doesn’t, there is something wrong with the fuel gauge or instrument cluster.
2. Check Fuse
Another simple check involves looking at the fuse. In some cases, the fuse will run multiple gauges, so you might notice something else isn’t reading correctly at the same time.
If you find a blown fuse, replace it and test the gauge again. However, if the fuse continues to fail, you might have a larger electrical system problem on your hands.
3. Inspect Wiring
While checking all of the wiring isn’t difficult, it does take some time. You want to start at the gas tank and inspect the wiring harness. You also need to look at the ground connections, which can become corroded due to rain, snow and salt.
If you spot any corrosion, remove the connection and clean it. Make sure you reattach it to the appropriate location. If you find a broken wire, you need to replace it.
You can also ohm measure the wiring from the gauge and then compare the results measured at the sender, if there is a difference in ohm there, it is very likely that there is an open or shorted circuit.
4. Test Sending Unit
If all of the wiring looks good and there’s not an issue with the fuse, you have to move on to checking the sending unit. In some cases, it’s just the float that is broken.
To test the sending unit, set your multimeter to ohms. Place one probe on the sending terminal with the other on the ground. As you move the float, the resistance should change on your multimeter. If there is no change, your sending unit has failed.
If you have a sending unit with the fuel pump integrated into the assembly, you will have a harder time testing it. When these fail, the whole pump assembly must be replaced. In some car models, you have to remove the fuel tank to reach the sending unit, which makes the whole process much more difficult.
5. Check the Gauge
If you have an older vehicle, the gauge should have two terminals. One is used to receive power any time that the ignition is on, while the other is the wire coming from the sending unit. Test continuity between the sending terminal and the connection at the tank. If you don’t have continuity, you need to find a break in the wiring.
You can also test the fuel gauge by checking the resistance. With a newer vehicle, it can be nearly impossible to do this with the integrated instrument cluster. You might need to disassemble the entire cluster to get to the gauge, which is why it’s best to carefully inspect the wiring and sending unit first.
Fuel Gauge Replacement Cost
Depending on the cause, fixing a bad fuel gauge can cost between $10 and $800. The least expensive fix would be to replace a blown fuse, which might only cost you $10, and you can easily do this yourself. If the fuel gauge is damaged, you can replace it for between $50 and $200, as long as you can perform the labor yourself. Otherwise, you might spend another $100 to $200 for the mechanic.
The most expensive repair is often replacing the sending unit. Not only can the part be expensive, but it’s time-consuming to replace. On some car models, you have to remove the whole fuel tank to reach the sender. Depending on what type of car you drive, you might spend between $200 and $800 until all is said and done.
Is there a fuse for the fuel gauge?
In most car models there is no separate fuse for just the fuel gauge. However, there is most likely one fuse or more for the instrument panel. Between the meter and the sender there are often only two wires without a fuse. Check your repair or owner’s manual if you are not sure if your car has a fuse for the fuel gauge.
How can I check my fuel level without a gauge?
There are a few ways to check your fuel level without a gauge. One way is to remove the tank cap and visually try to see the level. You can also use some kind of “dipstick” like a hose into the tank to measure it. You can also try to measure the fuel level with the odometer after filling a full tank.
What does F mean in a fuel gauge?
The letter ‘F’ stands for Full, indicating that the fuel tank is full. You may also find the letter ‘E’, which stands for Empty.
How do you calibrate a fuel gauge?
Most modern fuel gauges don’t require calibration. However, if you have a fuel gauge that needs to be calibrated, you need to use resistors and a multimeter to measure different fuel levels.
The fuel gauge system is actually quite simple even in modern cars, so it shouldn’t be too difficult to diagnose with some basic mechanical knowledge and knowing where the common problems are. The fuel gauge system usually consists of three parts: The fuel gauge sender sensor, the fuel gauge in the instrument cluster, and the wiring between.
If your fuel gauge isn’t working or is inaccurate, there are a few things you can check yourself before taking it to the shop. First, fill the fuel tank until it is full. This can sometimes dislodge a stuck fuel gauge floater. You also want to try giving the fuel gauge a gentle tap with your hand, and if it starts working after that, you most likely have a bad fuel gauge.
If none of the methods in this article worked, you may need to take your car to a mechanic for a more advanced diagnosis. In some cases, it can actually save you money instead of replacing fully functional parts.
Learn more:
- Check Fuel Fill Inlet – What Does It Mean & How To Fix It?
- 7 Types of Gauges in a Car
- Temperature Gauge Stays On Cold? (Causes & How to Fix It)


