
When it comes to car diagnostics, there’s nothing more powerful than the OBD port. What is an OBD port, where is it located, and how is it used to keep your car in its best condition?
In this article, I cover the meaning and location of the OBD port. I also look at different variations and show you what it is used for. At the end of the article, I show you how to hook up a code scanner to the port for car diagnostics.
In This Article:
What is an OBD Port?
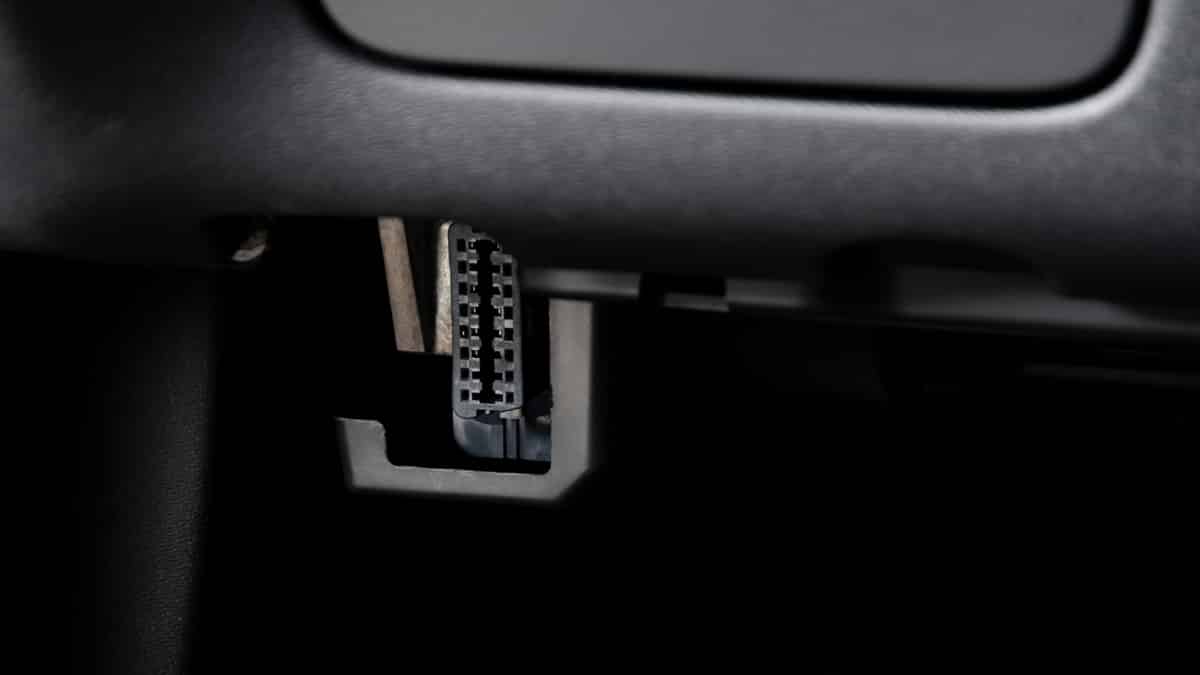
The OBD port is where you can connect a diagnostic computer to diagnose and read the trouble codes from your vehicle. OBD stands for Onboard diagnostics. There have been two main types, the OBD-I and OBD-II port. If the vehicle was made after 1996, it probably has an OBD 2 connector.
When a fault occurs within the sophisticated car systems, Diagnostic Trouble Codes or DTCs are set. These codes can be read and analyzed to figure out what’s going on with the help of a compatible scanning tool. The OBD scan tool is connected to the port to read the codes.
Each of the 16 pins has a different purpose with the OBD-II port. Here’s the breakdown of each pin’s purpose.
- 1: Manufacturer port
- 2: VPW and SAE J1850 PWM port
- 3: Manufacturer port
- 4: Ground
- 5: Ground
- 6: ISO 15765-4 CAN port
- 7: K-Line of ISO 14230-4 and ISO 9141-2
- 8-9: Vendor-specific
- 10: SAE J1850 PWM port
- 11-13: Vendor-specific
- 14: ISO 15765-4 CAN port
- 15: K-Line of ISO 14230-4 and ISO 9141-2 port
- 16: Car battery power
The OBD-II scanner connects to each of these ports to identify what the trouble codes are. With the majority of manufacturers, all of the protocols remain the same.
OBD Port Location
The most common location for the OBD port is under the steering wheel on the driver’s side. Another common place is near the center console panel, and sometimes even under the dashboard on the passenger side.
However, this is very different between car models and if it’s an OBD2 port or OBD1 port. The OBD ports are often concealed by a cover and can sometimes be quite difficult to find. On some car models like BMW, you will find the OBD port under the hood near the engine.
Make sure you check your owner’s manual for further instructions on how best to access them!
OBD-I vs. OBD-II
Before the release of OBD-1, each car manufacturer set its own OBD standards. For this reason, mechanics had to use a different scan tool to work with each manufacturer, which could get pricey. In 1987, OBD-I was introduced as a way of standardizing onboard diagnostics.
The sensors were able to detect issues with the computers and emissions systems. However, it wasn’t a perfect system.
To improve upon what was already established, OBD-II was created. This advanced port was released in 1996 with better diagnostic ability. While most manufacturers use the same overall codes, there will be some variations.
RELATED: OBD1 Codes – Trouble Code List & Reading (GM)
What Hooks Into OBD Port?
Mechanics use the OBDII port to hook in a scan tool that reads DTCs. The average home user can also order scan tools to gain access to basic information. There are more expensive scanners available to access real-time data and special codes from the airbag system or ABS, but most home users don’t need this level of capability.
There are also newer tools being released that rely on the OBD port. For example, anyone that wants to tune the ECU will plug in the special equipment to this port to gain access for the adjustments.
Dongles can be used by third-party companies, such as an insurance provider. With this technology, the driver’s movements are recorded, showing speed, braking power and more, so the insurance company can offer safe driver discounts.
Additionally, telecommunication companies are now using the port. Verizon has a Hum device that gives you vehicle statistics while on the go. It can also track down your vehicle if it gets stolen. Plus, companies are using the port to provide Wi-Fi connectivity.
However, whenever you give the OBD port over to third-party companies, there is a level of risk to consider. Your car is susceptible to cyber-attacks, so you want to be sure you know what you are doing.
RELATED: 10 Best OBD2 Scanners of 2022 – Review & Buyer’s Guide
How to Use OBD2 Port to Read Engine Codes
1. Locate Port
Before you can run any scans, you must locate the OBD-II port. In most cars, you will find it under the dashboard on the driver’s side.
You can see the 16-pin port sitting under the dash. You may need to change your position slightly to see it clearly.
2. Plug Scanner Into Port
Pull out the connector of your code scanner. You want to get this plugged into the OBD2 port under the dashboard.
You want to use care when plugging it in. Otherwise, you could cause damage to the pins, making the port unusable.
3. Turn on Car Power
As you are plugging in the code scanner, the car engine should be off. You also don’t need it on to read the codes.
Instead, you will turn the key to the ON position without cranking the engine on. If you sit in the car seat while you read the codes, you won’t need to listen to the open door chime.
4. Enter Vital Information
Before you can get any codes, you may need to enter some information. Some scanners will require the Vehicle Identification Number (VIN) before continuing.
There’s also the chance that you need to input what engine or other specs are included with the vehicle. You can find this information in the owner’s manual if you don’t have it.
RELATED: Where Can You Find the VIN on Your Car?
5. Read Codes
To get the engine codes, you will need to push a button on the scan tool. It might say something as simple as “SCAN.”
You can also use the scanner for other purposes, depending on what it’s capable of. Read the owner’s manual to the scanner to see what else it is capable of and to get in-depth operating instructions.
6. Research Codes
Read the codes that are given. It’s best to write these down so you don’t forget them, especially if there are multiple to take note of. Many codes can have multiple fixes, so you will have to do some investigative work to figure out where the problem lies in your situation.
The internet provides a great resource for finding the answers to most common codes. However, you must be careful where you get your information from, because some of it can be misleading or inaccurate. To get information directly from a mechanic, research the codes on Mechanic Base instead.
If you drive a car that uses special codes, your research might need to be more in-depth. You must remember to look at the code meanings for that manufacturer or you could end up with the wrong fix.
RELATED: OBD2 Codes List: On-Board Diagnostic P Codes (Free List)
7. Repair Faults
Once you understand what the code means, you are ready to repair it. If there’s a small problem that’s easy to repair, such as a spark plug replacement, you might be able to do this yourself.
However, there could be engine codes that illustrate a complicated problem. If you aren’t sure how to perform the fix, it’s best to visit a professional mechanic.
8. Clear Codes
Once the fault has been repaired, you can use your code scanner to clear the original codes. Read the owner’s manual to determine how to do this for the model you have.
Also, you can clear codes at the beginning of the diagnostics if there are too many to go through. Then, a short drive should activate the most recent codes again, so you can focus on one or two relevant codes, instead.
9. Test Drive
After you clear the codes, it’s best to go for a test drive. Not only will this help you feel comfortable with the repair, but it will also prove that the situation is in the past.
If the code is truly fixed, it won’t come back. However, if the Check Engine Light comes back on, you might not have performed the right fix. It’s time to go back to the drawing board.


