
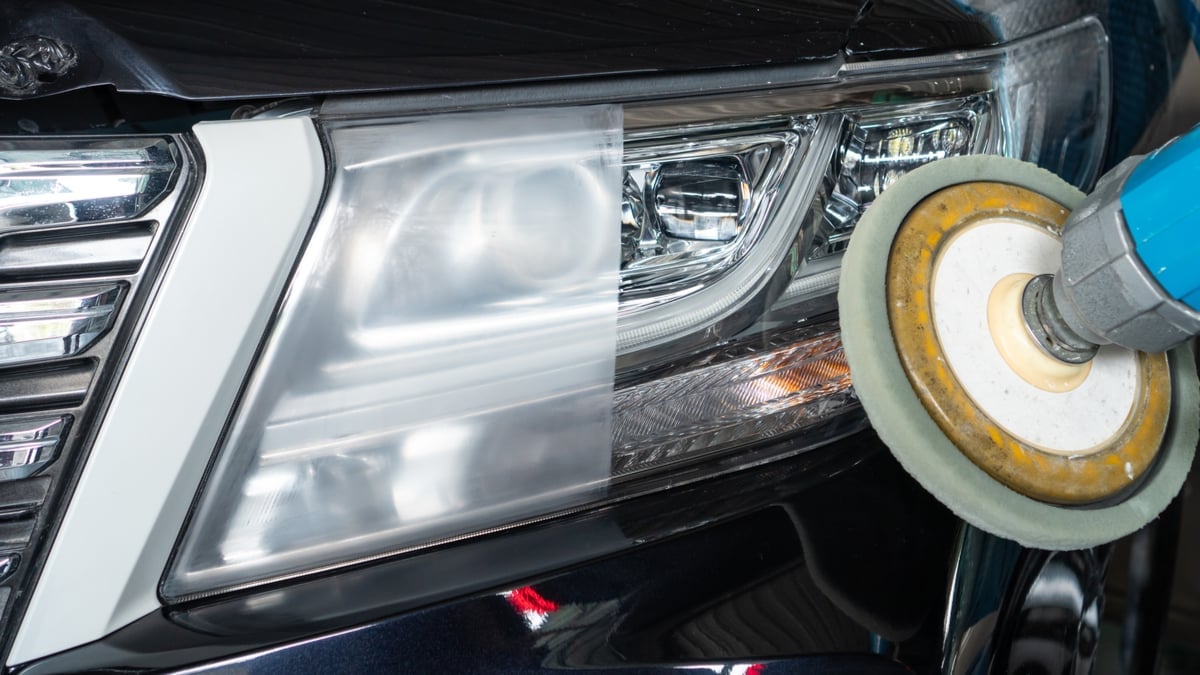
If you haven’t checked your headlights lately, take a look; you might notice they’ve turned cloudy or yellowed over time. Dull headlights don’t just make your car look older; they also reduce visibility and safety when driving at night.
A good headlight restoration kit can bring them back to life, making them shine as bright as they did when your vehicle was new. But not every kit delivers the same results, and the wrong one can end up being a waste of money.
That’s why we’ve reviewed ten of the best headlight restoration kits on the market and included a complete buyer’s guide to help you choose the right one.
Disclaimer: This article may contain affiliate links. This means that at no extra cost to you, we may earn a small commission on qualifying purchases.
In This Article:
10 Best Headlight Restoration Kits
1. 3M Headlight Lens – Best Headlight Restoration Kit Overall
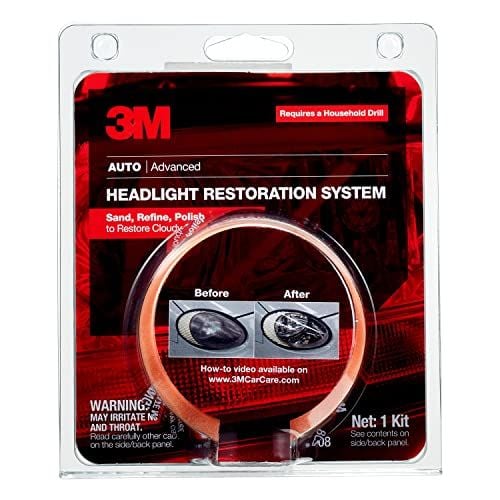
If you’re looking for the best headlight restoration kit out there, this is it. It’s the perfect combination of price and performance that can make your headlight look like new again.
It has everything you need to get the job done, so you don’t have to worry about having any additional tools to use this kit. While it’s not the most straightforward application process, it’s certainly manageable if you take the time to read the instructions.
Don’t wing it, take your time, and this kit will have your headlights looking like new in no time. However, keep in mind that this 3M headlight kit is exactly what most headlights need. But if your vehicle’s headlights need more extensive restorations, you might need to invest in the other 3M kit a little further down our list.
Still, for most headlights, this is exactly what you need, and if you go for the other kit, you’re simply spending more for the same results.
Pros
- A great mix of price and performance
- Restores headlights to “like-new” condition
- Has everything you need to do an outstanding job
Cons
- Not the simplest application process
2. Cerakote Ceramic Headlight Restoration Kit – Best Budget
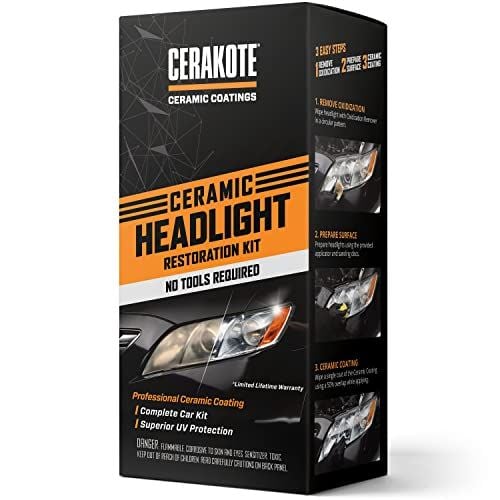
If you don’t want to spend a ton of cash but need your headlights to clear up a bit, then the Cerakote Ceramic Headlight Restoration Kit is precisely what you need. Not only is it a more affordable option for restoring headlights, but it’s an extremely simple application process.
This means you don’t need to overthink how to do it, and you don’t even need any tools to use it! That means when you see the cost of the Cerakote Ceramic Headlight Restoration Kit, that’s the final cost associated with restoring your headlights.
However, while it’s super easy to use and affordable, there’s a reason that it’s not our top choice. While it does a great job at restoring your headlights some, it won’t be quite as effective as our top choice. But if you just need better performance, or if your headlights aren’t all that faded, then this is a great choice that won’t cost you a ton either.
Pros
- Very affordable option
- Simple application process
- You don’t need any tools
Cons
- Not as effective as more expensive options
3. Meguiar’s G2980 Heavy Duty Headlight Restoration Kit – Premium Choice
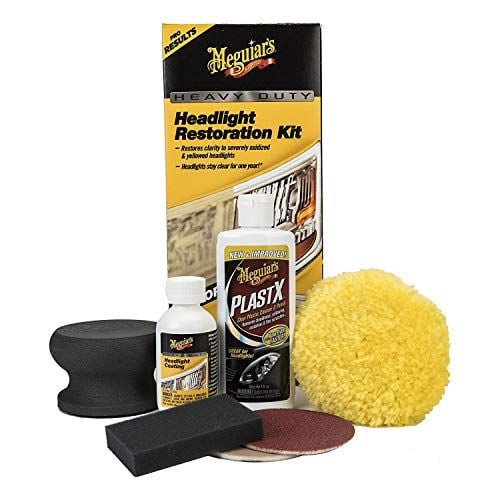
Sometimes you have a headlight that you think you can’t bring back, that’s when you need Meguiar’s G2980 Heavy Duty Headlight Restoration Kit. Sure, it’s a more expensive option but when a regular headlight cleaning kit doesn’t cut it, this will.
Even better, this kit uses a long-lasting formula that provides protection for up to 12-months, so you don’t have to worry about any fading or fogging for at least a year. This kit gives you professional-quality results, but keep in mind that you’ll need a drill to apply it.
All you need is a common household drill, but if you don’t already have one, then it’s another expense you need to factor in. However, it’s this drill that really takes the results to the next level and helps clean up even the most faded and fogged headlights.
If you have a headlight that needs a little more TLC, then you really need to go with a restoration kit that uses a drill, and Meguiar’s G2980 Heavy Duty Headlight Restoration Kit is as good as it gets.
Pros
- Restores even the most faded/fogged headlights
- It lasts up to 12-months
- Provides professional-quality results
Cons
- More expensive option
- You need a drill
4. 3M Heavy Duty Restoration Kit with Quick Clear Coat – Best for Professionals
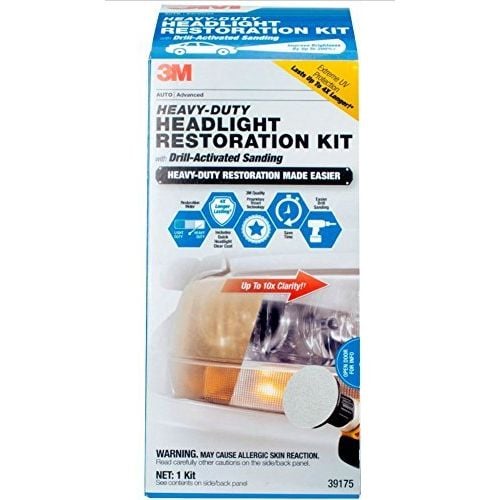
If you’re running a business, you need the best possible results, and nothing else matters. With this 3M Heavy Duty Headlight Restoration Kit with Quick Clear Coat that’s precisely what you’re getting.
Not only does it do a phenomenal job at restoring the headlights, but it takes it the extra mile by providing a clear protective coating to the headlight. This prevents future dirt and grime from gumming up the headlights, and it keeps the results lasting longer than any other product.
However, there are a few drawbacks to this headlight restoration kit. First is the price. It’s undoubtedly one of the more expensive kits out there, but for the results you get it’s worth every penny. Second, you need a drill. This is the case for most top-end headlight restoration kits, and this 3M kit is no exception.
Finally, the most notable drawback for most people is the application process. While it’s certainly possible to figure it out if you take the time to read the instructions, it’s a more complicated process compared to most other restoration kits.
Pros
- Best possible results
- It has both a cleaning and protective coating
- Longest-lasting results
Cons
- More expensive option
- You need a drill
- More complicated application process
5. Chemical Guys GAP11516 Headlight Restore and Protect
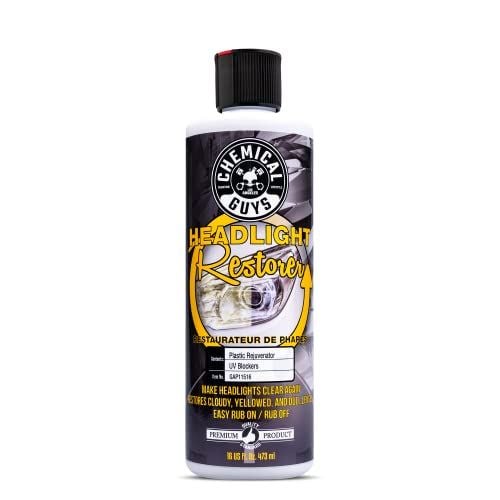
Chemical Guys makes a ton of top-notch products, so it’s no surprise to find that they have a headlight restoration kit on our list. However, while most of the products on our list are the full kits, it’s important to note that this is only the chemical compound you need to restore your headlights.
You don’t need much more to get the job done, but unlike most kits, this doesn’t come with everything that you need. Still, with a microfiber cloth, it’s insanely easy to apply, and it’s one of the most effective headlight restoration compounds out there.
It also comes with a ton of product, so if you think that you’ll need to restore lights on multiple vehicles, you can get the job done with just one bottle of Chemical Guys GAP11516 Headlight Restore and Protect.
Super effective and super easy to use, it’s only the fact that you need to purchase everything else separately that keeps this product off the top of our list.
Pros
- Provides tons of product
- Easy to apply
- Very effective
Cons
- It only comes with the chemical compound
6. Turtle Wax T-43 Headlight Cleaner and Sealant
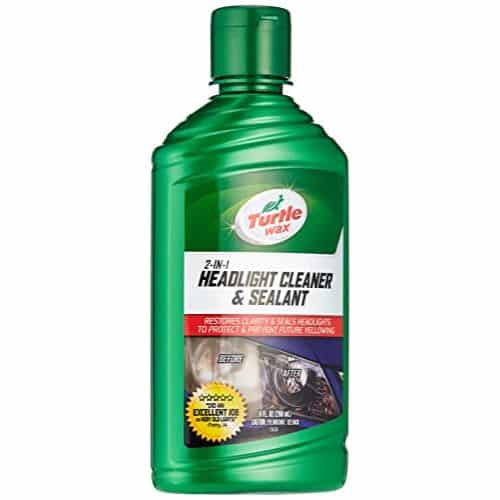
Turtle Wax is another huge name in the automotive care industry, and their T-43 Headlight Cleaner and Sealant is another great product that they push out. Not only does it clean and restore headlights, but it also seals them to prevent future problems from cropping up.
This Turtle Wax headlight cleaner and sealant is easy to apply, and it’s really an outstanding mix of price and quality. While it’s not as effective at restoring headlights as the top options on our list, it does a better job than most at sealing the headlights.
And just like the Chemical Guys headlight restoration kit, this Turtle Wax includes only the chemical compound. It’s more than enough to complete several headlight restorations, but it’s not quite as large as the Chemical Guys product.
To use this headlight cleaner and sealant, you’ll need a microfiber cloth to get the job done. And if you invest in a household drill and the attachment for headlight cleaning you’ll get even better results.
Pros
- It both cleans and seals headlights
- Decent amount of product
- Easy to apply
- Good combination of price and quality
Cons
- Not as effective as the top choices
- It only includes the chemical compound
7. Philips Headlight Restoration Kit
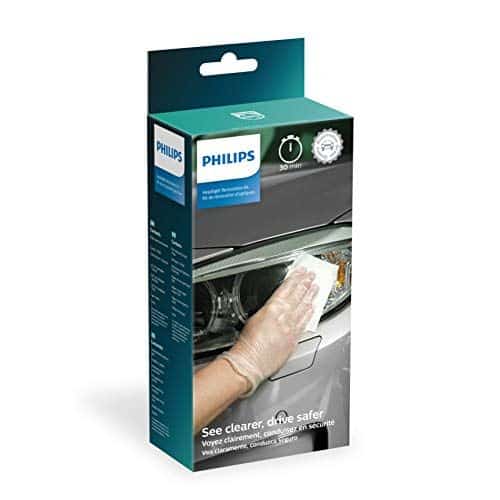
Philips is well-known for their lighting products, but they’ve also ventured into the headlight restoration business. While they’re not at the top of our list, it’s still a highly effective kit. It’s easy to use, and you don’t need anything outside of the kit to use it.
The most notable perk of this kit is that it provides up to two years of UV protection to help keep your headlight from fading again. Still, while there’s plenty to like about this kit, it did fall towards the bottom of our list for a reason.
The first issue is the price. While it’s not a super expensive kit, it is a bit more expensive for what you’re getting quality-wise. This kit isn’t quite as effective as our top choices, but it’s priced similarly to those products.
It’ll get the job done for you, and you won’t regret going with this headlight restoration kit, but we simply like the choices higher up on this list just a bit more.
Pros
- Very easy to use
- You don’t need any tools
- Provides up to two years of UV protection
Cons
- Slightly more expensive option
- Not as effective as the top choices
8. Sylvania Headlight Restoration Kit

Sylvania is another lighting company that ventured into the world of automotive headlight restoration and did a good job with it. This headlight restoration kit is extremely easy to use, and it provides tons of UV protection.
It does an outstanding job of protecting headlights, and if you’re looking to keep those results longer, you can purchase the UV block and activator separately. This allows you to get longer-lasting protection without the need to spend a ton of money on an entire kit that you don’t need.
But while it does a great job protecting your headlights, especially from UV rays over time, it’s not the best restoration kit out there. If your headlights already have a ton of fading or fogging, then it’s probably not the best choice for you.
However, if you’re looking for a product that will keep them from fading or fogging again, then this might be the best choice out there.
Pros
- Easy to apply
- Provides UV protection
- You can purchase the UV block and activator separate
- It does a great job protecting headlights
Cons
- Not as great at restoring headlights
9. Mothers 07251 NuLens Headlight Renewal Kit
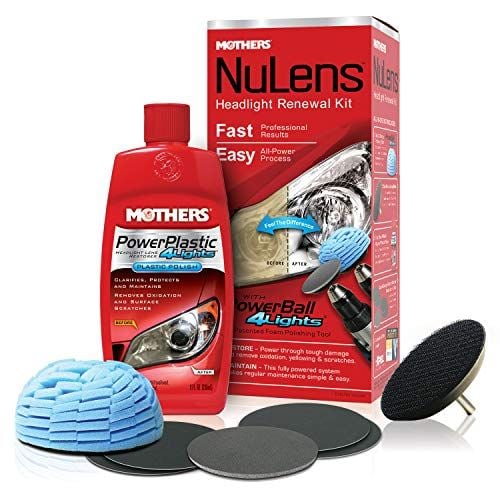
While you likely never heard of Mother’s NuLens Headlight Renewal Kit before now, that doesn’t mean that they’re not worth checking out. This kit does a great job of restoring headlights, and it even comes with bulk purchase opens if you’re restoring a ton of headlights!
But just because you can purchase in bulk doesn’t mean you need to. That’s because each product comes with a decent amount, so for most people a single kit is more than enough to get their vehicle’s headlights looking like new.
The only real reasons this headlight kit fell to the bottom half of our list is the price and the fact that you need a drill to use it. It’s not that it’s not a great choice and can’t restore your headlights, it’s that you can easily spend less money and get the same results.
Still, if you do opt for this headlight, you’ll be happy with the results, and that’s enough to earn it a spot on our list even if it is a bit overpriced.
Pros
- It does a great job restoring headlights
- You can purchase in bulk
- It comes with a decent amount of product
Cons
- More expensive option
- You need a drill
10. CLT Headlight Restoration Kit
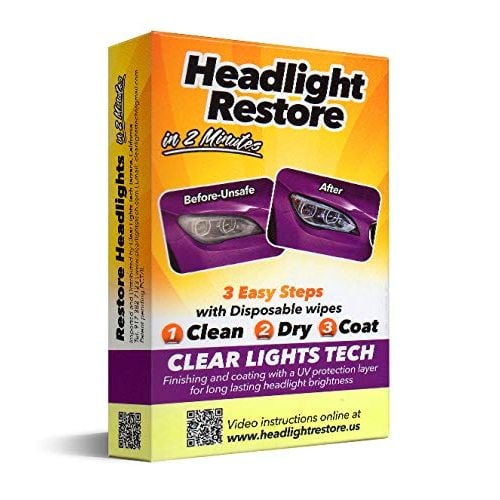
Rounding out our list of the best headlight restoration kits out there is the CLT Headlight Restoration Kit. It’s the lowest-priced option on our entire list, and it’s also by far the easiest to use. While most other kits use liquid chemical compounds and rags to clear up the headlights, this kit uses wipes.
All you need to do is wipe down the headlight to see significant improvements and clear things up! However, while these wipes help clear up some fogging and provide UV protection, they don’t do nearly as good of a job as other kits on our list.
It’s why we recommend using these wipes as a preventative product instead of a restorative one. It’s the quickest way to get some extra UV protection onto your headlights, and it doesn’t cost a ton to do. Still, it doesn’t come with a ton of product, so ensure you order enough and realize how long it’s going to last before you purchase anything.
Pros
- Very affordable option
- Very easy to apply
- Provides UV protection
Cons
- Not the most effective choice
- It doesn’t come with a ton of product
Buyer’s Guide
With so many great headlight restoration products out there, it can be a challenge trying to narrow down your selection to just one. We understand the dilemma, and that’s why we came up with this comprehensive buyer’s guide to walk you through everything you need to know to get the perfect headlight restoration kit the first time!
Are Headlight Restoration Kits Worth It?
Absolutely! Considering the cost of a headlight assembly ranges from $250 to $700, and the cost of a restoration kit is between $10 and $35, there are few better values out there.
Even better, while some products only buy you time until you need to replace the main assembly, a headlight restoration does more than that. With proper care, there’s a good chance that a headlight restoration kit will extend the life of the headlight assembly to match the life of your vehicle – so you’ll never need to replace it.
Headlight restoration kits are a great value and can save you a ton of money – so yes, they’re absolutely worth every penny.
Why Do Headlight Assemblies Get Cloudy?
Automotive headlights get cloudy through a process called “oxidation.” This happens when UV rays from the sun interact with the polycarbonate layer in modern headlights and form microscopic cracks. But while this is the primary cause of headlight cloudiness, it’s not the only one.
Other factors include dirt and debris kicking up from the road and hitting the headlight and water vapors forming on the inside of the headlight assembly. If you have water vapors forming on the inside of your headlight assembly, chances are a headlight restoration kit won’t work.
That’s because these kits only clear up the cracks from oxidation and road grime on the exterior of the headlight, they don’t do a thing for anything going on inside of them.
How Often Do You Need to Use a Headlight Restoration Kit?
It really depends on the kit, but on average, a headlight restoration kit should keep a headlight from oxidizing again for about 12 months. Still, if you go for a lower-budget headlight restoration kit it might only last nine months, while a high-end kit might last two years.
But for just about every product on our list we recommend applying it once a year. This ensures that the oxidation never gets so bad that you can’t restore it completely. If you leave the headlights alone for too long a headlight restoration kit might not bring it back to a like-new condition.
Should You Wet Sand Headlight Assemblies?
Yes! One of the most common mistakes when restoring a headlight is neglecting to wet sand it when you start. Use 800-grit sandpaper and spray it down with a water bottle before sanding down each headlight.
You want to do this until you see the fine scratches from the sandpaper everywhere. This completely removes the oxidation from the headlights, and your restoration kit will take care of the small scratches you create in the next steps.
How Long Should a Headlight Assembly Last?
If you use a headlight restoration kit every few years, there’s no reason your headlight assembly can’t last the entire lifetime of your vehicle. Of course, there’s still a bit of luck that goes into this because if the wrong rock kicks up while you’re driving down the highway it can crack your headlight assembly.
But typically, if you care for your headlight assembly, you’ll never need to replace it. However, if you simply let time take its toll, you might find that you need to spend between $500 and $1,400 to replace both headlight assemblies anywhere from seven to ten years down the road.
How Can You Prevent Headlight Assemblies from Fading?
There are a few things you can do if you want to keep your vehicle’s headlight assemblies from fading in the first place. First, try to park your vehicle inside whenever you get the chance. This keeps UV rays from hitting the headlights in the first place, which significantly slows down the oxidation process.
Second, apply a headlight restoration kit and UV preventative to the headlights about once every 12-months. This keeps the UV rays from hitting the polycarbonate coating in the headlight assembly, so the breakdown never occurs.
Can You Restore Headlights Without a Kit?
If you search the Internet, you’ll find tons of homemade “remedies” for cloudy headlights. From Dawn dish soap to Magic Erasers, people out there will try to sell you on any homemade remedy.
The truth is that while these remedies work for headlights with little to no oxidation, they have two main drawbacks. First, they don’t help with more severe cases. Second, it doesn’t provide any UV protection.
That means your headlights will oxidize again in short order, and you’ll have to pay extra attention to ensure that it doesn’t get too bad. You can use a homemade remedy if you’re in a pinch, but it’s best to stick with the good stuff.
How to Use a Headlight Restoration Kit
It doesn’t matter what headlight restoration kit you get if you don’t take the time to use it the right way. But in order to use it the right way, you have to know how to use it. That’s why we’re going to give you a quick rundown of how to use a headlight restoration kit here.
1. Find the Right Location
When you’re looking to restore your headlights, finding the right location to do it is key. You need to find somewhere with adequate lighting, but it shouldn’t be in direct sunlight. Not only that, but ensure that the temperatures are well above freezing for the best possible results.
2. Prepare the Headlight
There are a few things you need to do to prepare the headlight assembly for the restoration process. First, you should clean off the headlights a bit. This isn’t when you use the cleaning compounds in the kit, instead, just wipe off any dirt or grime that’s settled on the headlight.
Second, tape around the headlight assembly. You don’t want the chemicals or the sandpaper to hit the paint, and by simply taping the area around the headlight assembly you create a buffer to keep this from happening.
3. Wet Sand the Headlight
Once you have the headlight assembly ready, it’s time to wet sand the headlight. This is an often-skipped step, but if you want the best possible results, it’s not one you want to ignore.
Get 800-grit sandpaper and use a ¼” section for each headlight assembly. You want fine sandpaper nicks throughout the entire assembly to help the restoration process take place and give you a crystal-clear appearance.
When you’re sanding the headlight ensure that you wet both the sandpaper and the headlight assembly, as this lets you get the most out of your sandpaper and get the most consistent results.
Keep in mind that you’re not trying to smooth out the headlight in this step, but you’re also not trying to overly sand it down. Look for the fine nicks and then leave it at that.
4. Use Your Cleaning Compounds
Now that you finished preparing and wet sanding the headlight, it’s time to thoroughly clean it. Use the cleaning compound that comes with the restoration kit for the best results. If your kit doesn’t come with a cleaning compound, you can use some Dawn dish soap, but don’t expect it to give the same quality of results.
Don’t be shy during the process and do your best to clean the entire headlight and not miss any spots. It might take a little longer, but it’s crucial to giving you consistent results throughout.
5. Dry the Headlight
Once you finish using the cleaning compounds on the headlight, ensure that you take the time to dry them thoroughly before moving on. Use a microfiber cloth to dry off the headlights, as this prevents water spots from forming and won’t scratch up the headlights at all.
6. Apply the Coating Solution
Now that you have the headlight clean, it’s time to apply the restoration coating. This is the chemical that comes with every restoration kit on our list, and it’s the part that actually restores the headlights.
While we’d love to walk you through the exact process you need to follow for each kit, the truth is that it’s different for each product. Read through the instruction manual and follow their steps exactly to get the best possible results.
7. Add a Second Coat
After you finish with the first coat, take the time to do it all again. This second coat does two things. First, it helps with any spots you might have missed the first time. Even if you didn’t miss spots, it’ll help by giving you consistent results throughout the entire headlight.
Some areas are bound to have experienced more oxidation than others, and sometimes a single coat won’t clear up the trouble areas completely. A second coat eliminates that problem and gives you a crystal-clear finish throughout.
Second, a second coat gives your headlights an additional layer of UV protection. This additional layer of protection will help delay the onset of new oxidation, and this will keep your headlights looking new longer.
It also helps reduce the risk of oxidation getting to the point to where you can’t repair them. Give it a second coat, even if everything is already new looking after the first one.
8. Wait and Inspect the Results!
If there’s any step that’s more skipped than wet sanding, it’s waiting. We get it, the first thing you want to do when you’re done restoring your headlights is hit the open road and see how much better they are! Resist the temptation.
Instead, wait 24-hours before taking your vehicle out on the road. This gives everything time to both dry and cure. If you hit the road too soon dirt, grime, oxygen, UV rays, and just about everything else can still work their way through the compound.
While this might not sound like a huge deal, it can lead to premature headlight wear and ruin all of your hard work. If you have an indoor garage that you can park your vehicle in for the next 24-hours it’s ideal, but otherwise, do your best to keep your vehicle away from traffic, rain, or other inclement weather until everything cures.
If you’re still wondering what headlight restoration kit is right for your vehicle after reading through the reviews and the buyer’s guide, chances are you’re overthinking it. The 3M Headlight Lens Restoration System is our top choice for a reason, and it’ll do a great job on your vehicle.
Now if you’re headlights already have a ton of oxidation and you need to throw everything out there at it, consider Meguiar’s G2980 Heavy Duty Headlight Restoration Kit. Sure it’s a bit more expensive, but it packs a punch that can restore almost any headlight out there.But really what’s most important is that you get something on order. Because the longer you wait the more your headlight assembly will oxidize, and the harder it will be to get it looking like new again.


