
Even if you are the type of driver that regularly washes and waxes your car, you can still deal with condensation in headlights for no fault of your own. But, what causes this moisture to build up, and what can be done to remove it?
Throughout this guide, we are going to examine the reasons that condensation occurs in headlights. We also walk through the steps to removing the moisture and show you the difference between condensation and water ingress. Finally, we give you some tips to prevent moisture from occurring, and we answer your top headlight condensation questions.
In This Article:
What Causes Condensation in Headlights?
The majority of car headlights are going to generate some type of heat. Some varieties generate much more heat than others, such as if you are using halogen headlight bulbs. Because of this heat, there must be adequate ventilation to ensure the operating temperature remains normal.
Headlights have a venting feature to ensure that the heat is reduced, but this design can also allow some moisture to infiltrate the assembly.
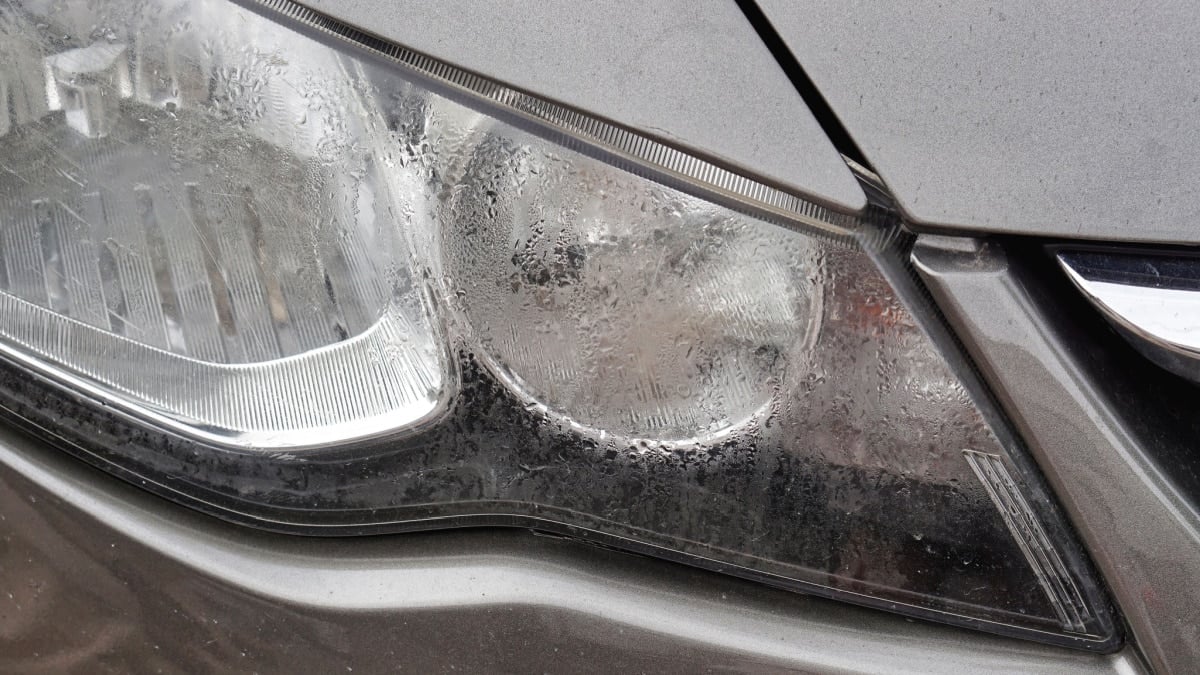
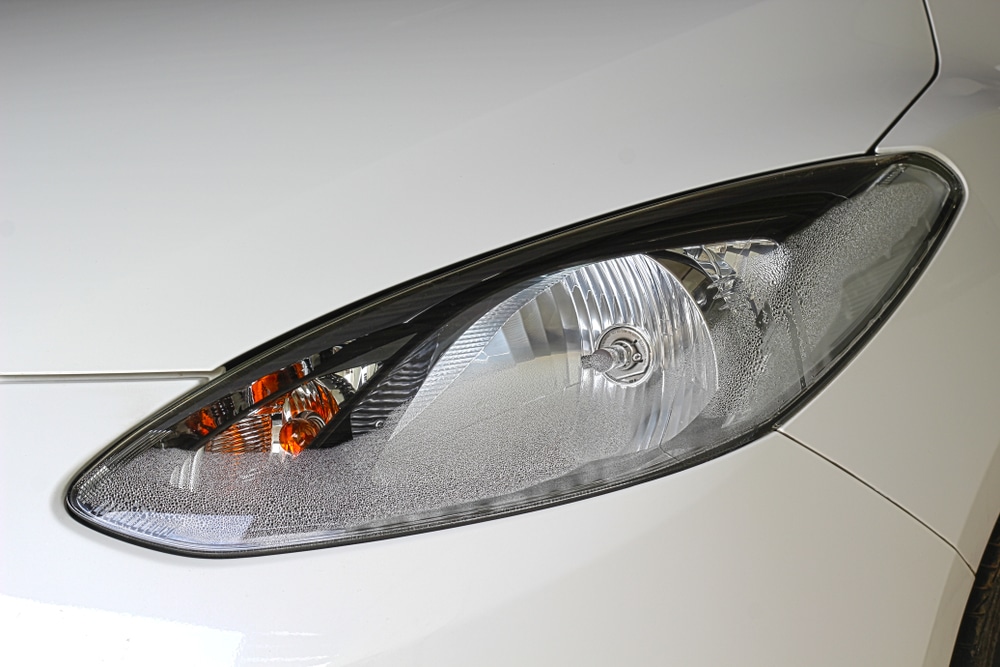
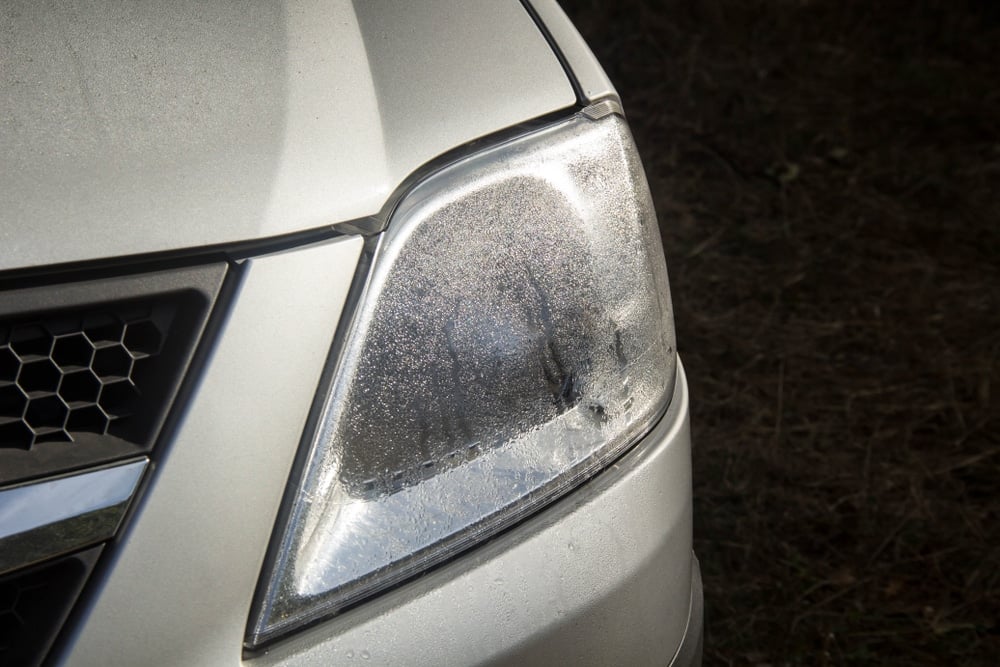
If moisture does get inside, the lamp materials are supposed to absorb it as long as the lights are turned on. With that said, the lens exterior is going to be cooler than the inside, so moisture will stick to the lens. This design leads to headlight condensation.
Thermal convection explains that warm air is going to move up with the cooler air moving down. As the two meet, condensation naturally occurs. Sadly, many drivers deal with this issue occurring on the headlight lens.
RELATED: Xenon vs. LED vs. Halogen Headlights – What’s the Difference?
How to Remove Condensation in Headlights?
If the condensation just occurred, try turning on the headlights to see if it burns off. Otherwise, you may need to use a can of compressed air to clean the headlight vents or a hair dryer to remove the water. If there are defects with the headlight housing, the only solution is to replace it to create a better seal.
Here is a more detailed list of how to remove condensation and moisture from your car’s headlights.
1. Wait it Out
In normal operating conditions, the moisture will resolve itself. Car designers understand condensation is going to occur, so it should work itself out. In fact, automakers, such as Hyundai have released service bulletins instructing technicians not to interfere with normal headlight condensation.
Turn on the headlights and let the heat do its work. It shouldn’t take long before the moisture evaporates and you have clear vision once again. If your car uses LED bulbs, this may not work as well as you would hope. Still, you can get the same results from parking the car in the sun. Just be warned that the UV rays can discolor the lenses over time, plus the sunlight can damage the car’s paint and interior.
2. Compressed Air
If the vent of the headlight assembly is blocked, the moisture won’t be able to escape. There’s no reason to worry, though, because it’s nothing that some compressed air can’t fix.
With a can of compressed air, try to blow out the blockage occurring at the vents. However, you want to use caution with this method because you could end up pushing the dirt and debris into the headlight housing instead of knocking it loose.
3. Hair Dryer
If the moisture is severe, you may need something more powerful to resolve the problem. Carefully remove your headlight assembly, using caution so that you don’t break the seal.
With a hair dryer, you can manually dry out each part of the assembly. While using a hair dryer, you need to be careful about how much heat is used. If the dryer gets too hot, it could melt electrical components, such as the wiring. It can also harm the rubber or lens. For that reason, you don’t want the hair dryer to blow higher than 180 degrees Fahrenheit.
After removing the moisture from the headlight, you need to go through the next step to ensure that the headlight is sealed except for the valve and drain hole, otherwise, the same problem will occur again.
4. Fix or Replace Headlight Assembly
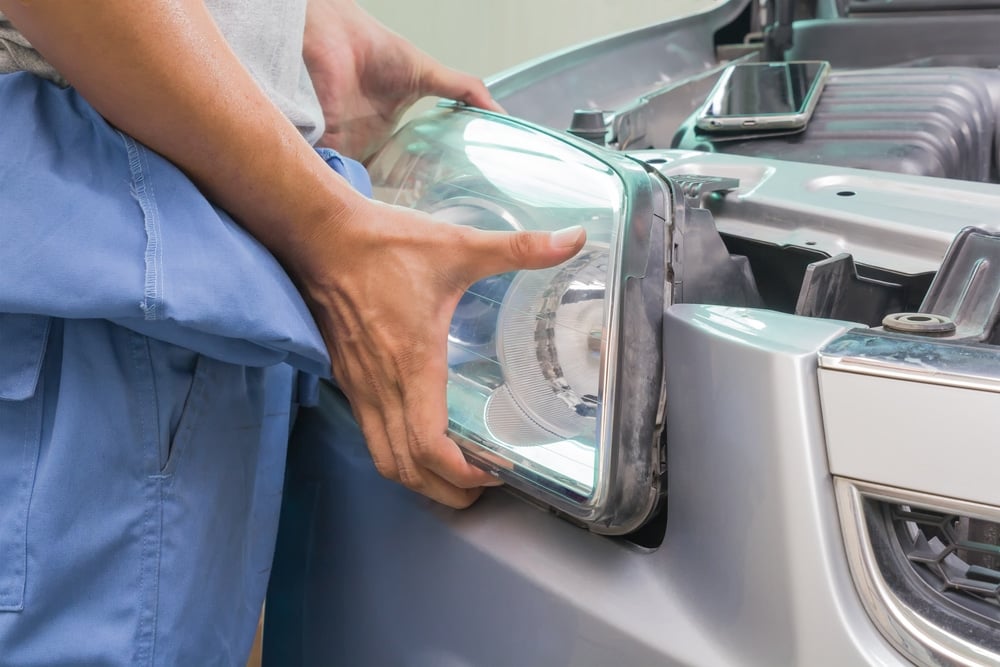
If the other methods aren’t working for you or the problem keeps occurring, you need to look at replacing or fixing the headlight assembly. There is some sort of defect that is allowing the moisture to build up.
The existing headlight assembly might have a crack or damage to the rubber gasket. In either of these situations, more water will be allowed into the headlight than it should hold. Price out your options. If the assembly is expensive and you just need a new rubber gasket, go with that route. Otherwise, go ahead and get a new assembly, especially if it is cracked.
Condensation vs. Water Ingress
If you are looking at moisture in the headlights, it’s important to determine whether you are dealing with normal condensation or water ingress. With this understanding, you will better know how to resolve the problem.
Headlight condensation occurs when water vapor turns from a gas into a liquid. It’s the opposite of what happens with evaporation. Condensation appears as fogging, misting or small moisture droplets found inside the light lens. Because condensation is a normal process, the light’s operation should never be affected. In most cases, it should evaporate on its own and it won’t lead to additional damage.
The same cannot be said about water ingress. When water leaks into the light and builds up, this is more severe than condensation. The ingress indicates that there is damage to the headlight assembly where the water is able to get inside. Once inside the assembly, the water will not evaporate normally and it can start to pool.
If the headlight assembly is covered by a warranty, you may be able to have it replaced at no charge because of the defect. Otherwise, you need to replace it yourself before significant damage occurs to the headlight or electrical components.
Preventing Moisture in Headlights
1. Inspect Headlights Regularly
Normal condensation is natural and is going to happen, but you can prevent large-scale water infiltration with regular inspections. If the drain holes of the light assembly are clogged, water is going to build up. By noticing this early, you can unclog the holes before problems occur.
Additionally, if you see a defect with the headlight assembly, such as a broken seal, you can attempt to fix it before the water gets inside. However, if the lens or housing is cracked, it’s best to replace it.
2. Use Headlights Often
By using your headlights, you can prevent moisture from getting out of control. The heat from the bulbs helps to burn off the condensation as it occurs.
Turn on your headlights often, even if you rarely drive at night. You can also park in the sun occasionally, but be aware that this could lead to UV damage to the lights, body and interior of the car over time.
3. Create Strong Seal
The headlight assembly must have a strong seal to prevent water ingress. Thankfully, it’s easy to find some high-quality sealant products that help you create this bond. After doing some research, you may find that these steps help you get a seal in place.
- Carefully remove the headlight assembly.
- Inspect the existing seal for debris or damage.
- Clean off any debris that is easy to remove.
- Run a bead of sealant on the factory seal to keep the moisture out.
- If the seal is broken, you may need to replace it completely.
- Reinstall the headlight assembly. Double-check the angle and make sure you reconnect everything the way it was when you removed it.
- Test the light to see if it shines normally.
- Continue inspecting the housing to see if moisture problems are reduced.
During this time, you should also inspect the O-rings that surround the bulb, vents and electrical connectors. If the O-rings appear to be worn out, you want to replace them to ensure water doesn’t infiltrate deeper into the light. You can also use a sealant gel to repair small cracks you find between the housing and the lens.
Will Condensation in a Headlight Go Away?
When the headlight design is working as it should, the water should drain on its own and the condensation should burn off when the lights are turned on. However, some light bulbs don’t create as much warmth, such as LEDs, so the process can take a little longer until the sun burns off the moisture.
Does Condensation Damage Headlights?
Condensation doesn’t affect how the headlights work on the functionality. You shouldn’t notice any difference in the performance and most reflectors come pre-treated with an insulator spray to prevent deterioration or rusting. However, if the seals inside the assembly are damaged, water could infiltrate the electrical components, leading to bigger trouble.
Does WD-40 Defog Headlights?
Most households have a can of WD-40 lying around for random jobs that need to be resolved. If you are dealing with headlight fogging, you may find that this all-purpose lubricant can help. While it’s not the ideal cleaner, it should clear things up enough to get you by in a jam.
Will Vinegar Damage Headlights?
Vinegar is a great all-purpose cleaner that can also be used on headlights. It’s known for being effective at removing discoloration and fog from headlights. It should also take away grime and dirt that has built up on the lens. Once the lenses get yellow or hazy, you may want to mix a little vinegar with some baking soda for an even more powerful solution.
Will Magic Eraser Clean Foggy Headlights?
Magic Eraser should never be used on the paint of a vehicle because it will cause damage. However, it’s been a safe option to use on cloudy or foggy headlights. It can also help to remove the yellow discoloration that happens over time. Carefully buff each lens with the wet Magic Eraser and wipe it off with a paper towel before you let it completely air dry.
Conclusion
In some cases, the moisture will dry up on its own. If you must intervene, you can try some compressed air or a hair dryer and ensure the headlights are sealed. If all else fails, you may need to replace the headlight assembly with a new one, especially if the existing part is allowing moisture to infiltrate the lens.
It can be ugly dealing with condensation in headlights, especially when you take pride in how well your vehicle looks. Not only do you want to inspect the headlights right away to ensure there are no mechanical issues looming, but it’s also best to deal with the condensation quickly before it builds up. In some cases, the condensation will work itself out without the need for intervention, but you should always be ready to follow our steps for a crystal-clear view once again.
Learn more:
- Car Door Drains – Do You Need To Drain Them Manually?
- 10 Best Headlight Restoration Kits
- How To Remove Water Spots From Car (& How To Prevent it)


