
The thermostat housing is a lesser discussed component on the car, but you will learn about it quickly once there’s a leak to deal with. What is the purpose of the thermostat housing, and why would a leak occur?
In this guide, I dive deeper into the function and location of the thermostat housing. I also look at what causes a leak, and show you what it might cost to replace it. Finally, I give you some simple steps to replace the thermostat housing on your own.
In This Article:
Thermostat Housing Function
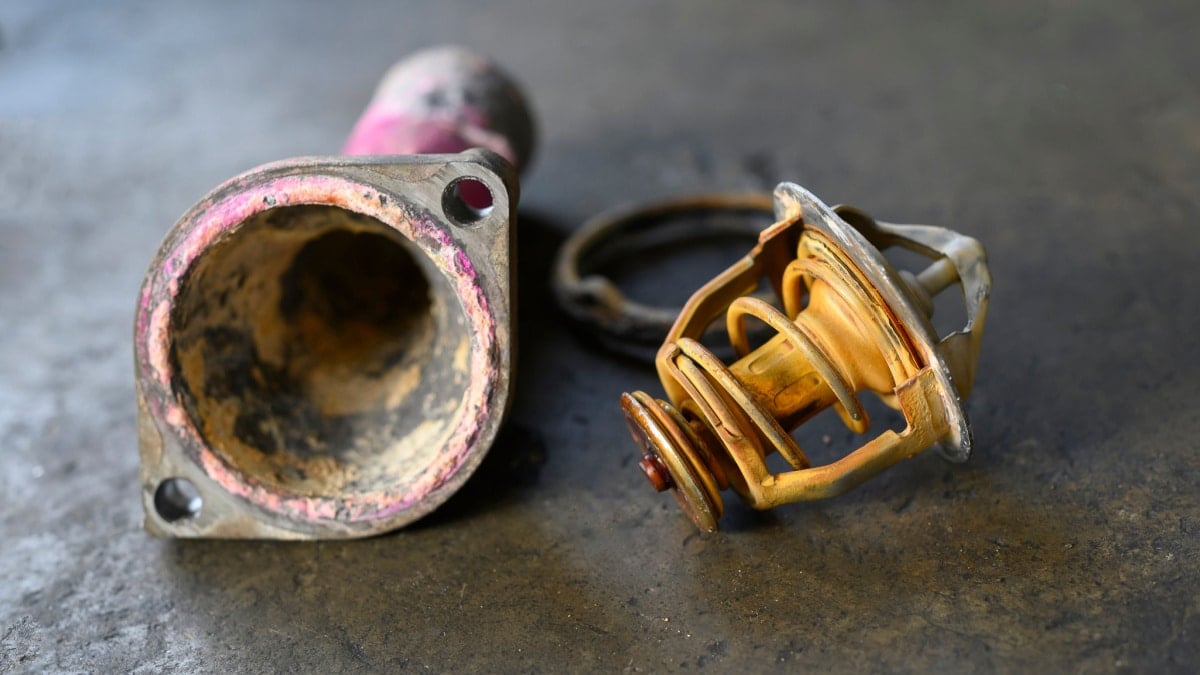
The thermostat housing holds the thermostat, and it can be a standalone or integrated design, depending on what type of vehicle you drive. Leaks are normally caused by a damaged or cracked housing, a failing seal, or because of exposure to extreme temperatures.
The cooling system is designed to keep the engine running at the best temperature, thereby avoiding overheating. Coolant and water are sent through the engine block to remove the heat. This fluid is routed by the water pump, that’s driven by the serpentine belt. To determine how much coolant should be sent, the thermostat needs to read the temperatures and determine whether to open or close the system.
When the engine is cool or operating below the normal operating temperature, the thermostat stays closed. With a closed thermostat, the coolant is circulating in the engine, but not back to the radiator. However, once the engine becomes too hot, the thermostat opens, so the coolant can get back to the radiator, where the temperature is reduced. The thermostat housing is holding the thermostat in place. It doesn’t have a purpose other than to hold the thermostat where it needs to be for proper operation.
RELATED: 5 Symptoms of a Bad Car Thermostat (& Replacement Cost)
Thermostat Housing Location
The thermostat tends to be placed where the car’s upper radiator hose is connected to its intake manifold cooling passage. You will find it near the water pump in most cases, but it could also be found on the lower hose in some car models.
There are some vehicles that have two thermostats, especially diesel trucks. Either way, the thermostat housing is going to encompass this part. It’s the area where the thermostat sits.
Thermostat Housing Leak Causes
1. Damaged/Cracked Housing
Most often, the thermostat housing leaks because it becomes damaged or cracked. The majority of housings are made from either plastic or metal, but they are not indestructible.
The housing can also become damaged because the mechanic installing or replacing it applies too much torque to the bolts. Once the housing becomes damaged, coolant will leak and create a problem.
2. Failing Seals
The housing also contains seals or gaskets to ensure a secure fit. As with any gaskets or seals, the material wears down over time.
At first, you may just notice a small amount of seepage. As the damage gets worse, the coolant will leak out more.
3. Exposure to Extreme Temperatures
Considering that the thermostat housing is responsible for circulating coolant, you would think it could handle high temperatures. That’s true to a point.
However, if the engine overheats, the housing will be subject to heat it’s not meant to deal with. This excessive heat can cause damage to the housing, which leads to a leak.
Thermostat Housing Replacement Cost
On average, you might spend $75 to $400 to replace the thermostat housing. The part itself may only cost $25 to $250. If you can’t replace it yourself, the labor might add another $50 to $150.
In most cases, the job is simple enough to perform if you have basic mechanical knowledge and the right tools. However, you shouldn’t try to tackle the job if you are unfamiliar with the system and coolant bleeding.
If your car came equipped with a plastic thermostat, you may be able to purchase an aluminum replacement instead. These aftermarket parts don’t add much more to the price, but should last longer. For the additional cost, you could save yourself from having to perform another replacement down the road.
How to Replace the Thermostat Housing
1. Prepare Area
Before you start any repair, you want to get your area ready. Park on a flat surface and make sure the parking brake is on to secure the vehicle.
You also want to gather all the tools and supplies (coolant) that you need ahead of time. This simple step reduces the time you spend hunting down equipment when you need it.
2. Cool Engine
Before you move on, it’s essential to let the engine sit. The motor should be completely cooled off before moving forward.
If you were out driving, then the car may need to sit for an hour. Pop the hood and come back when it’s time to proceed. If you haven’t been driving, you should be able to get started right away.
3. Empty the coolant
In some vehicles, there is a drain plug for the coolant on the bottom of the radiator. Draining the coolant through the drain plug before will make the whole procedure more pleasant. Use a bucket to collect the coolant.
However, there are plenty of models that don’t require this step and don’t have a drain plug. That’s why it’s important to read through the service manual before proceeding.
4. Remove Thermostat Housing Bolts
On most housings, there are two bolts that hold everything in its position. You will want to remove these bolts with the help of a socket wrench.
You can also use an adjustable crescent wrench. This tool helps you to put pressure where it’s needed without taking your hands off.
5. Take off Thermostat Housing
Once the bolts have been removed, you should be able to take off the housing without much effort. Pull the housing straight up to take it off.
Remember that if you didn’t drain the coolant before through the drain plug, it will pour out a lot of coolant by removing the thermostat housing. Place a large bucket under so you will not spill coolant on the floor. Coolant is poisonous.
While the housing is off, inspect the gasket. If there’s any sign of wear or damage, you will need to replace the gasket too. Some people prefer to do this even if the gasket looks like it’s in great shape.
RELATED: How to Safely Dispose of Old Antifreeze
6. Clean Surface Area
Before you attach the housing, you want to clean the area where it will attach. There shouldn’t be any residual debris or contaminants between the two. If there is, leakage could continue, even after the repair.
You could use an engine degreaser to get all of the old gasket off. Make sure all of the cleaner residue is also removed before you attach the new housing.
7. Install New Housing
Put the new housing in its position and tighten the bolts carefully. You don’t want to overtighten these bolts or you could cause the new housing to break. Additionally, you may need to put coolant in the reservoir to get the levels back up to normal.
Then you need to bleed the coolant system, which can be quite difficult. Use a repair manual or this guide: How to Bleed Your Cars Cooling System (9 Easy Steps)
Your next step is to take the vehicle for a test drive. Pay close attention to the temperature gauge. Once you get the vehicle back, you should also look at the housing to see if there are any apparent leaks. If it is still leaking, the problem could be a gasket that wasn’t put in properly during the installation.
RELATED: How Much Coolant Does a Car Hold?
Can you drive with a cracked thermostat housing?
No. It is not recommended to drive with a cracked thermostat housing. A cracked thermostat housing will in most cases leak, and this can cause your engine to lose coolant and overheat. An overheated engine can quickly become irreparably damaged.
How long should a thermostat housing last?
Thermostat housings are built to last the life of the car. However, many thermostat housings are made of plastic or metals that will wear out over time. You can expect a thermostat housing to last at least 10 years in most car models.
Why would a thermostat housing crack?
A thermostat housing is in most car models made of plastic or metal. If it is made of plastic, it will wear down over time due to the heat. If it is made of metal, it may begin to corrode over time and crack.
Can you replace a car thermostat yourself?
Replacing the thermostat is a fairly simple job in most car models. However, properly bleeding the cooling system to prevent damage afterward is the difficult part. However, with the right tools and a good repair manual, it is possible for almost anyone.


