
When the weather is hot, you dream about getting in your car with the air conditioning pumping out cold air. It becomes even more of a disappointment when the air is not working the way it should. When the air doesn’t cool as it should, it’s not uncommon to find the AC low side pressure too high, but what causes this to occur?
In this guide, I look at the possible causes in-depth. I also examine how to test the air conditioning pressures and discuss the repair costs.
In This Article:
AC Low Side Pressure Too High
If the air conditioning isn’t blowing cold air and the low side pressure is too high, it could be caused by issues with the condenser fan. However, there’s also the possibility that the system has been overcharged with too much refrigerant.
1. Defective Condenser Fan
When the fan becomes damaged, airflow through the condenser is diminished. It’s also possible that there is debris blocking some of the airflow, which would lead to the same problem.
Aside from blowing out warm air, there’s also the chance of a leak occurring because of the fan issues. The low pressure side isn’t designed to handle these higher pressures, so damage is sure to follow, even to the point of creating an evaporator coil leak. If this happens, the air conditioning system is in serious trouble, requiring much more extensive repairs.
2. Overcharged AC
There’s also the chance that the system is simply overcharged. You will see high pressures even if you have the engine turned off.
Either you put too much refrigerant into the AC system, or there’s an excessive amount of oil. Either way, the problem won’t resolve itself until you release some of that pressure, which should ideally be done by a mechanic.
AC Low Side Pressure Too High, High Side Too Low
If the low side pressure is too high, and the high side pressure is low, the compressor is often to blame. However, it could also be due to the dryer, expansion valve, or AC pressure switch.
The dryer is responsible for taking moisture out of the refrigerant. If it doesn’t work, the moisture remains, leading to lower pressure on the high side and higher pressures on the low side.
Additionally, the expansion valve can become clogged or defective. This issue causes the temperature and pressure of the refrigerant to be affected as it moves into the evaporator.
There’s also the chance that the AC pressure switch has gone bad. This vital air conditioning part is responsible for regulating refrigerant flow through the compressor. There are sensors located on both the low and high sides, constantly monitoring pressure. If either side gets off-balance, the compressor will switch off to prevent any damage. However, if the sensors or switch fail, it could cause a false reading and the pressures could get out of kilter.
RELATED: 4 Symptoms of a Bad AC Pressure Switch (High or Low)
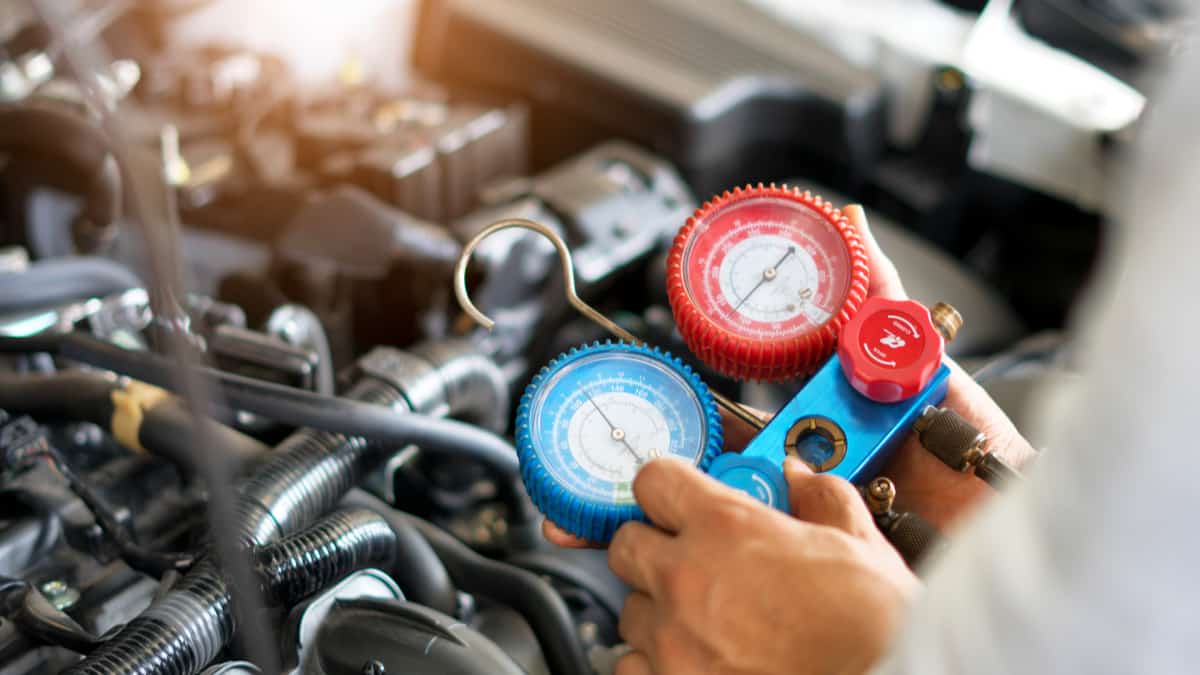
Testing AC Pressures

It isn’t difficult to test the AC pressures as long as you have a high-quality set of gauges. You also want to know what the appropriate pressures are for your vehicle, which can be found in the service manual. If you don’t have the service manual handy, you can look them up online in the vehicle specifications.
Hook up the AC pressure gauges. You will see two caps on the AC system. One cap is for the low-pressure side, while the other is for the high-pressure side. The high-pressure side contains a narrow diameter when compared with the other side.
If you are ever unsure which cap is on what side, you can find a detailed map in the service manual. Depending on the type of vehicle you drive, finding the ports can be the hardest part, as they are often hidden behind other parts, sometimes even the engine block.
Your gauge will show you the different sides with the help of a color-coding system. Red is used for high pressure, while blue is used on the low pressure side.
Take the caps off of the appropriate ports and attach the corresponding hoses. Push the connector on and release the sleeve so you can tighten it.
Turn on your car engine once the gauges are connected. Allow it to run for a few minutes so the refrigerant can flow, and you will get a proper reading. Check the gauges and evaluate the reading.
If everything is running normally, the blue (low-pressure) gauge will read between 20 and 30 PSI. On the other hand, a normal high-pressure side is usually between 200 and 250 PSI. Keep in mind that these figures are just estimates. Your vehicle could require something different, outlined in the service manual.
However, if the pressure on either side is too low or high, there’s clearly a problem. You want to have the system looked at as soon as possible to avoid any further damage.
AC Repair Costs
Fixing the air conditioning system requires special equipment and refrigerant that you might not be able to get on your own. The EPA requires licensing for many of these supplies, so you might need to visit a professional shop to get your air conditioning system worked on.
If you are capable of doing it yourself, you could safely evacuate some of the refrigerant or oil if the system is overcharged. If the AC condenser fan needs to be replaced, expect to pay $300 to $425 on average. The parts are going to make up the majority of the expense, at $225 to $300, while labor might be $75 to $125. If the fix requires the system to be re-gassed, you could spend $50 to $150 for this service, depending on your location and the type of vehicle you drive.
There’s always the chance that your air conditioning requires more extensive work, especially if a leak is discovered. Without knowing where the leak is and what parts need to be replaced, it’s difficult to estimate a cost.
In some cases, looking for the leak itself is what costs so much money. With small cracks in the pipes, a UV lamp is needed to discover the issue. You could spend as little as $55 for this diagnostic test or as much as $400 in some cases. On top of that, you have the labor and parts cost for the fix.
Whatever tasks you can do yourself will help to lower the costs. You can buy kits with the UV dye in them and get special glasses to see if you can find the leak on your own. Depending on where it is located, you may be able to repair it in your home garage.


